If you love Morel Mushrooms and can’t have enough of them, you are probably curious about how you can grow them by yourself indoors. Morel mushrooms are delicious and nutritious. There are many benefits of cultivating your own Morels indoors. In this article, you will learn what Morel mushrooms are, why they are good for you, why you should grow them, and the processes involved in growing Morel mushrooms indoors.

What Are Morel Mushrooms?
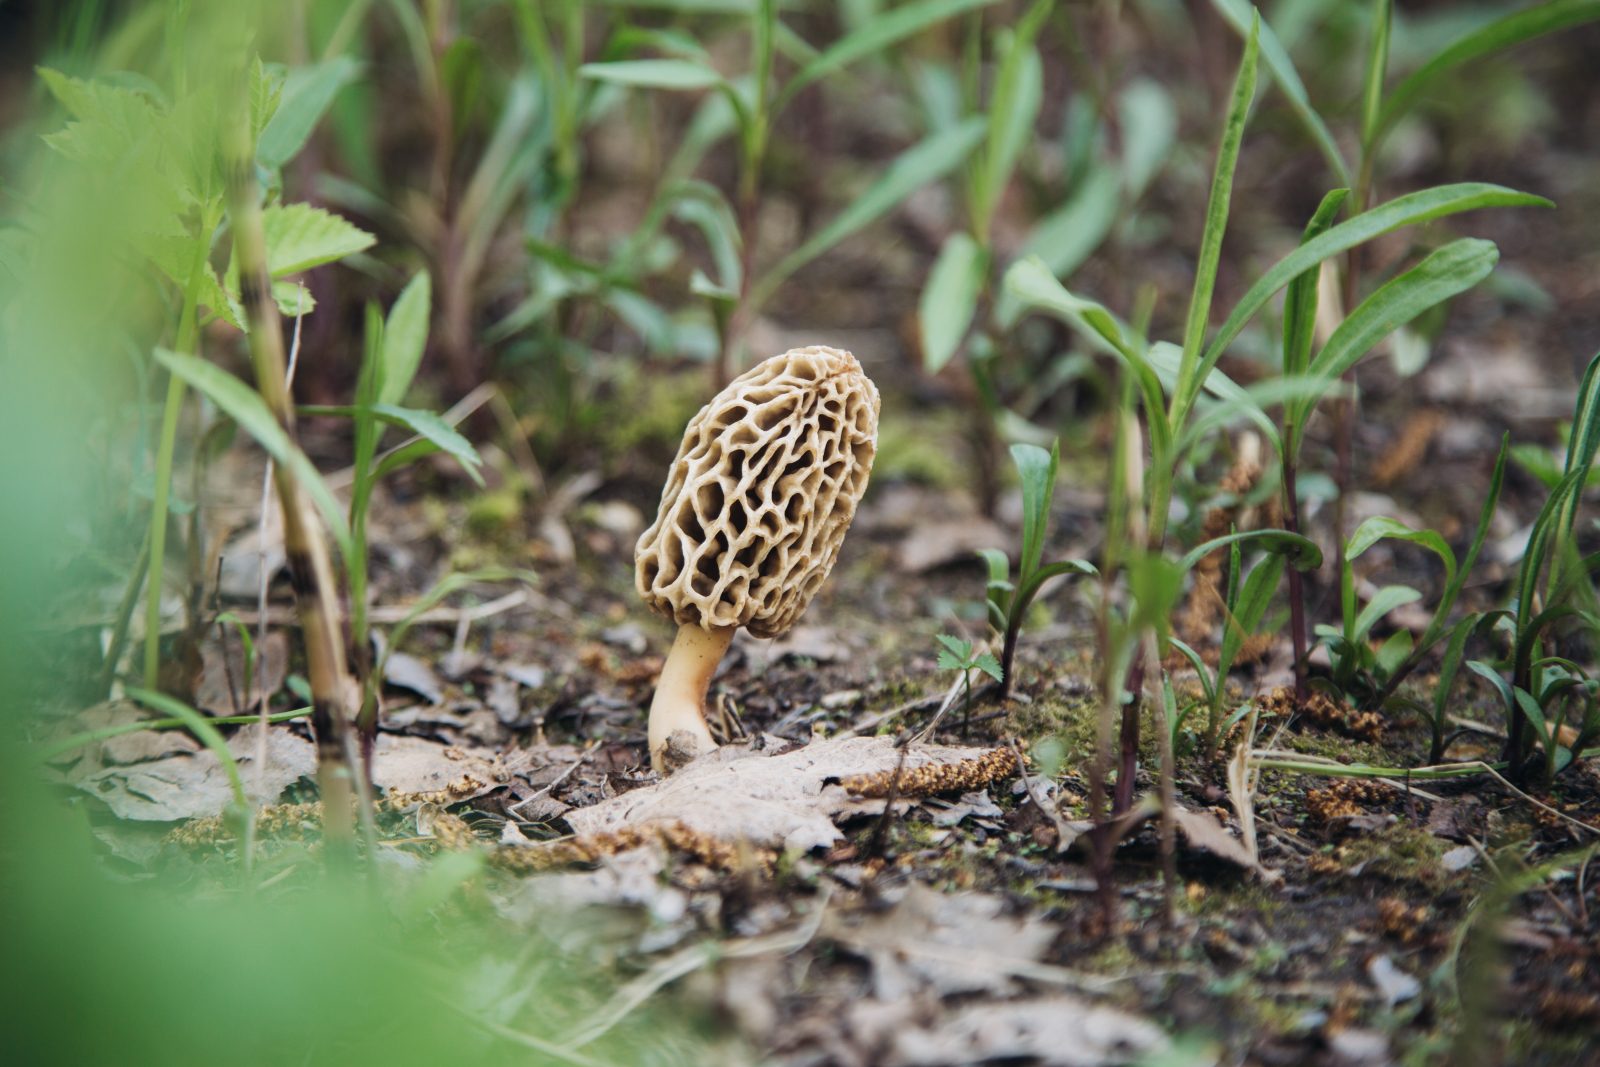
The term “Morel Mushroom” or “True Morels” is a name given to the different species in the genus “Morchella.” There are over 80 recognized species in this genus, and the most populous is Morchella esculena. They are all edible. True Morels should not be mistaken for False Morels.
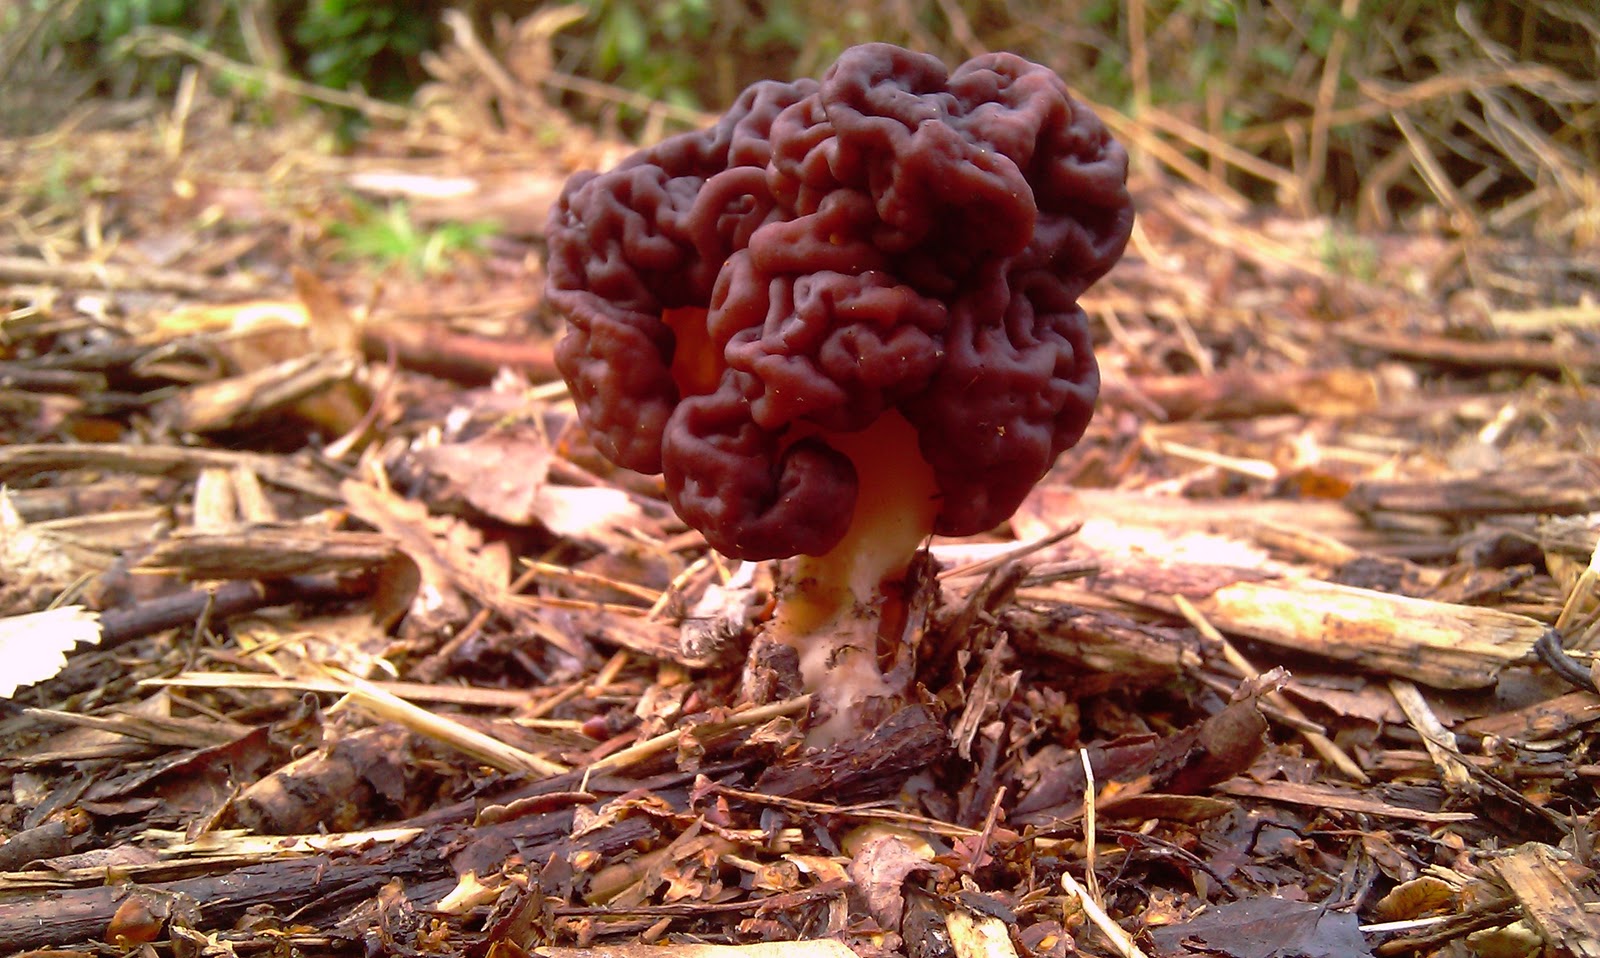
There are species in other genera (e.g., Verpa spp. and Gyromitra spp.) that resemble the Morels we eat. A typical example of False Morels Is the Gyromitra esculenta. Here are some distinguishable features between True and False Morels:
- True Morels have a honeycomb appearance while Gyromitra spp. have a wrinkled or brain-like appearance.
- Gyromitra esculenta is usually reddish-brown or dark brown.
- The stem of True Morels is always hollow, unlike that of Verpa spp. That contains a cottony substance inside.
- The capCap' refers to the removable covering of any part of a plant just like a capsule. For example, cohering petals that fall off are caps. of True Morels (Morchella spp.) is attached to the stem near or at the baseA base is the lowest part of an organism or organ. The base can appear as though it is above, but it is the lowest part of an organ (i.e. upper organ). A base can also represent the root crown of trees..
Why Are Morel Mushrooms Good For You?
Morel mushrooms are not just delicious but also very nutritious. They contain Carbohydrates, Protein, Fiber, Iron, and Vitamin D. They have moderate levels of Vitamins B6, B3, B2, Manganese, Phosphorus, and Zinc. They also contain Potassium, Calcium, and Folate.
You can use Morels in various cuisines. Dishes prepared with Morels are usually expensive worldwide. It is best to cook Morel mushrooms before eating. They can be preserved by freezing or drying.
Why Should Morels Be Cultivated
Morel mushrooms grow in the wild, but you can also cultivate them. Before 1982, the secret to Morel cultivation was still a mystery. Morels are difficult to grow because of their environmental requirements. Some Morels form a symbiotic relationship with trees (meaning that both organisms gain from each other). Some grow in forests that have been burned by a forest fire recently.
In 1982, Ron Ower became the first person to cultivate Morels indoors successfully. Since then, people have carried out experiments to grow Morel Mushrooms, and some commercial growers have had success in harvesting Morel Mushrooms.
Which do you think is safer? To pick Morels in the wild or to cultivate your own?
- Mushrooms collected from the wild have an unknown history, and some might contain toxins like the hydrazine toxin. Cultivated mushrooms, therefore, have an advantage because ingredients used to make the substrates (in which they grow on) are carefully selected.
- Wild Morels can only be found in spring or sometimes summer, but growing Morels in a controlled environmentThe factors influencing an organism (both internal and external). The surrounding of an organism. can increase the availability of Morels.
- Someone who does not fully know how to distinguish True Morels from False Morels can mistakenly collect False Morels, which are poisonous.
Now that you know more about Morel Mushrooms, read more to find out how to cultivate them yourself.
How to Start Growing Morel Mushrooms Indoors
You can cultivate Morel Mushrooms outdoors and indoors. Growing indoors allows you, the grower, to regulate the temperature to mimic the Morels required temperature. Indoor-grown Morels also have a better chance of a successful harvest because those grown outdoors compete against a high population of bacteria.
When planting crops, you have to get the seed or seedling of the plant. In mushroom cultivation, the “seeds” are called spores, and the “seedlings” are called a spawn of mycelia (singular: mycelium). To grow Morel mushrooms, you need to either get the spores from mature Morels or buy a prepared Morel mushroom kit.
If you are new to growing mushrooms, you might choose to buy a kit. You can get Morel mushroom kits from gardening shops near you or online shops. You can purchase morel mushroom kits at around $30.
Would you love to grow your own spawn from the spores of Morel mushrooms you bought or collected from the wild? Keep reading. If you prefer purchasing a Morel mushroom kit, jump to the next heading.

Growing Spawn from Store Bought or Wild Morel Spores
It is not difficult to grow your spawn. You will need:
- Canning jar
- Petri dish and agar
- Knife or sharp bladeBlade refers to the expanded parts of leaves and petals. It consists of the mesophyll and there is a network of veins present in it.
- Matured morel mushrooms
- Grain media (1 part potting soil, 5 part grain*)
*Grains include annualAnnual plants are plants that complete their lifecycle in a year. Annual plants germinate, grow, flower, and produce fruits, and die within a year. Examples of annual plants are maize, tomatoes, etc. ryegrass seeds, rapeseeds, hemp seeds, rice, etc. To prepare the grain media, soak the grain for 24 hours, drain out the water, and then mix with potting soil (1 part soil and 5 part grain).
Have you gathered the needed items? Follow the process below:
1. Buy or Collect Matured Morel Mushrooms
The first step is searching for mature Morel mushrooms. You can buy them from a shop, search for them in the wild, or ask a local cultivator for some.
2. Put Grain Media into a Canning Jar Then Sterilize
After preparing your grain media, put it into a canning jar, and then sterilize it by heating it in a pressure cooker at 15 psi for 1 hour.
3. Collect Spores from Matured Morels
To collect the spores of a Morel mushroom, hold the mushroom upside down over a freshly prepared petri dish with agar and then gently tap the mushroom. You will see the spores falling onto the agar.
4. Refrigerate the Spores
Cover and seal the dish, and then place it in a fridge at 55°-80°F (12.5°-26.5°C) for three days. Some spores will begin to grow their first vegetative parts (mycelial strands) in the dish.
5. Transplant and Continue Growing
When the petri dish is covered in mycelia, cut out a large section with a knife or sharp blade, and then insert it into the sterilized grain media.
Give more agar to the remaining section on the petri dish so that the mycelia will continue growing.
6. Mix the Mycelia with the Grain Media
Thoroughly shake and mix the grain media and the mycelia. In a few weeks, you will see more mycelia strands growing through the grain media. Open the jar in a draft-free room. Mushrooms require oxygen just like you.
In a few weeks, you will see fungi-colonized grain media. Congratulations!!! You have your Morel mushroom spawn.
Growing Morel Mushrooms from a Spawn
After you cultured or purchased the Morel mushroom spawn, what’s next? To grow morels, you need:
- Sand
- Potting soil
- Grain media
- Oven/autoclave bags
- OrganicAn organic material is any material derived from plants, animals, fungi, or microbe sources (i.e. living things) and is biodegradable. 'Organic' can also refer to the gardening practice that involve zero use of chemicals as fertilizers, pesticides, etc. Plants grown organically are healthier and produce fruits with more quality. matter (constituents below)
- Sterilized trays for mushroom substrate
Now you are ready for the next steps:
1. Gather the Mushroom Substrate Ingredients
To prepare morel mushroom substrate (i.e., where your morels will grow), you need:
- 30% sand
- 20% potting soil
- 50% organic matter
The organic matter should be:
- 10% rice hulls
- 5% sphagnum
- 5% soybean mean
- 80% hardwood chips from ash, elm, apple, or maple tree
- A little amount of lime (alkalineAny material with a pH of more than 7 to 14. Alkaline materials can also be called basic. Any material with pH 7 is neutral, while pH less than 7 to 0 is acidic.) to increase the pHPotential of Hydrogen or pH is a measurement of the acidity or alkalinity of any material. pH is read from 0-14. 0-6.9 is acidic, 7 is neutral, and 7.1-14 is alkaline (or basic) of the soil
2. Sterilize Trays with Substrate and Grain Media
Fill a tray with 2 inches of substrate, saturate thoroughly with water, then allow to drain completely. Then fill another tray with soaked and drained grain media.
3. Sterilize Your Substrate and Grain Media
Set the substrate tray on the grain media, then place both trays into an autoclave bag (you can use oven cooking bags), which has a filtered closure. Sterilize at 15 psi for 1 hour (pressure cooker).
4. Introduce Your Spawn into the Substrate Tray
When cool, open the substrate bag and evenly mix ½ cup of spawn with your substrate using a flame-sterilized spoon. Reclose the bag, then place it in a cool dark place.
After 4-6 weeks, you will see sclerotia (hard, dark just like seeds, much similar to what you bought in the kit) covering the surface of the substrate. This is known as spawn run.
5. Refrigerate Your Multiplied Spawn
Now remove the grain mediumAny material used as substrate for the growth of organisms such as plants, mushrooms, and microbes. Soil is the medium for most plants while a mixture of sawdust and grains is the medium of commercially cultured mushrooms. tray from the bag and throw the used grains into your compostAn organic matter made from decomposed plant materials. Compost is often made from decomposing shredded leaves, hay, fruits, and other plant materials at a ratio of 25 part dry brown materials to 1 part fresh green materials. pile. Reclose the substrate bag and refrigerate (30°-38°F or 3.3°-4.4°C) for two weeks.
6. Place Substrate Tray in a Room
Remove the substrate tray from the bag and place it in your grow room. Slowly pour distilled water of 65°-70°F (18°-21°C) at a rate of 1.5 – 2.5 ounce per hour per square foot of the substrate. Allow substrate to drain for up to 24 hours.
There should be sufficient light in the room. The room should be very humid (90%). If you do not have a humidifier, spray water droplets on the substrate twice daily with a spray bottle.
7. Caring For the Morels
When you see Premoridia (small mushroom caps), the substrate moisture should be 60%, the temperature should be 70-73°F (21-22.7°C), and 12 hours of grow lights should be used.
While the Fruiting Body (or cap) matures, the substrate moisture should be 50%, the temperature should be 73-77°F (22.7-25°C), and 12 hours of daily grow lights should be used.
This process (steps 12 and 13) can take up to two years, but the good news is that your Morchella will keep producing fruiting bodies for years.
Collect matured mushrooms by cuttingA part of a plant cut from a mother plant used to grow a new plant. For example, you can cut the stem of the rhizome of mint to grow new mint., not plucking.
Conclusion
To summarize, Morel mushrooms are sweet and edible mushrooms usually collected from the wild. Since 1982, methods of cultivating these mushrooms were developed. Indoor-cultivated mushrooms have advantages over outdoor-cultivated mushrooms.
Morel Mushrooms grow better with a pH of 7 or more and in a substrate where they have no bacterial competitors. You can buy an already cultured spawn, or you can culture it by yourself. Leftover spawn can be refrigerated.
So, what is your decision? Will you cultivate your own Morel Mushrooms? What method will you use? Please share your thoughts in the comment section below.





Your tips to place the spores in a fridge at 55°-80°F for three days seem helpful. My mother wanted to add some morel mushrooms in her garden, but they seem hard to grow. I’ll share your tips with her and tell her that she can buy a quality morel growing kit for easy planting.